Monday, 16 February 2015

Unsurprising Scale Update

I said that I would post more with progression but I've realised that it's probably not very interesting just watching a set of scales grow. Really it's more for me but I'm ok with that, I like seeing things progress!


I finished the first bit of the scales in record time, mostly to the tunes of Aladdin and Mulan in case you were interested! So I got it to this point super quick and then added a line of stabilising rings down each edge. These are additional rings that effectively take the place of a scale at the edges so they hang neatly and don't flop about quite so much.


I then decided that I needed to try this on with a piece of leather so I could see how it would look on a real neck. I discovered that it's *really hard* to take a photo of your own neck whilst holding the scales in place so please excuse the photo!


I had some feedback that this looked uncomfortable which is possibly due to the aforementioned difficulty in taking the photo or possibly because it looks like there should be lots of sharp things pointing at my collar bone. The truth is that it's surprisingly comfortable! The scales conform to your neck (or in this case the leather) and shift as you move. The links at the back are saw cut so they match up with no jagged edges or burrs so even without the leather there's no catching or scraping. the scales themselves aren't sharp, the edges are smooth and even digging myself in the hand with them (for science) I can't really do any damage.

I did a very quick whip stitch to attach the scales to a strip of very thin leather that I had lying around. It's by no means the right type of leather and I really don't recommend stitching jump rings to anything but it gave me a good idea of how wide the leather should be and let me see that the chain was long enough for my neck, leaving a small gap at the back for a buckle or clasp. However, this piece isn't for me and when the owner came to try it on, the chain was a little too short to go all the way round.

I may have learnt the hard way that you really need to remove the stabilising rings before you extend any scale work but once they were out it was actually fairly easy to add in more scales along one edge until it got to the desired length.

So I am now at this stage. I have extended the work by a couple of inches and now just need to add the stabilising rings to the edge and to the bottom. you can see to the left that some of the scales aren't sitting right but this problem will be solved by the extra rings.

I discussed shaping this piece over the wearer's shoulders or further down his chest to be almost like a gorget but, the wearer intends to wear a collared robe over the top of the scales so he preferred to have it finish just below his collar for comfort.

The next stage will be all about adding a leather collar behind the scales and for that I will be asking a very talented leather working friend for all the help!

Tuesday, 3 February 2015

A New Project

I know it's been forever since my last post but I'm all excited about my new project tonight! It's another scale project for the same person who owns the gloves from the previous post but this time it will be a neck piece inspired heavily by this beautiful piece.

So I'm looking at a wide leather choker with the scales attached at the top and a buckle at the back for comfortable adjustment.In a slight change to the one shown above I'm looking at having small eyelets to add support to the holes and the scales will match the scales he has on his gloves.

Day 1: 

I'm so happy to be working with scales again, I think they're my favourite medium and I am genuinely really thankful for the excuse to get to work on another project with them. Tonight I got home a little late and managed to work 4 rows so roughly 80 scales to 180 rings. I've looped though a spare bit of wool through the top row since I find this makes it easier to do the first few rows but I hear that you can also make it easier by using different coloured rings for the top row. I wasn't clever enough to order a different colour but the wool works just fine.

This is the back of the work which is the side I work from. I'll try to post more as it progresses.


Thursday, 15 May 2014

The Dragon Scale Gloves: Attempt 1


I may have mentioned that I was a little bit excited to get my scales in from The Ring Lord a couple of weeks ago and some really soft acrylic yarn to knit them with. Well, I've now had a chance to play with them and I have a gorgeous set of dragon scale gloves to prove it! So without further ado, here's the project!


The Supplies

484 Small Anodised Aluminium Scales
100g King Cole Smooth DK Yarn
1 pair 4mm Straight Knitting Needles
1 Yarn Needle
1 pair Scissors

The scales come in *many* colours but for this set the guy I'm making them for wanted plain grey wool with grey scales that weren't overly shiny, so basically not the mirrored ones. I ordered a bulk load of the frost ones which worked out somewhere in the region of £66 for 1500 scales once I'd factored in postage and the import VAT and the handling fee from Royal Mail. This is much cheaper than anything I've found in the UK even with the massive cost of postage so I'm happy with my bargain.

The yarn may be a note of contention for people who like to knit with real wool and natural materials. I guess you could use bamboo silk or something equally strong but I like the easy availability of acrylic, not to mention the price, the fact that it's machine washable (except if you add scales) and the fact it doesn't irritate my skin, even around my everso delicate neck. It's usually what's used for knitting baby clothes and toys and for a good reason, you can tug at it, get it soggy and generally abuse it without any loss of strength. Perfect for keeping those scales attached!

The Pattern

I bought a pattern for this despite having no intention to pay it much attention, mostly because I have a blog-crush on Sarah from Crafty Mutt and wanted to support her business since she's taught me my new favourite craft. The pattern I got is from her etsy store here where she also sells little kits to make your own scaled gloves so if you're wanting to give it a try without having to import many lots from Canada I highly recommend taking a look. She doesn't pay me for advertising, I just think if you find something you love you should share it and hope that other people find joy in it too.

The pattern is really simple and includes lots of handy tips for knitting with scales and how to make patterns if that's your bag. Any beginner knitter could pick it up so long as they can do a knit stitch, it's basically a rectangle that you sew up the sides to make arm warmers.

I did mention that I wasn't planning to pay much attention to that though, right? I wanted scales to go all the way round the wrist rather than only covering the back of the hand so this is the pattern I wrote

Cast on 30st 
1. Knit two rows
2. Knit 2 *Knit with scale, Knit 1* Repeat everything between the *s to last two stitches (13 scales), Knit 2
3. Knit across
4. Knit 2 *Knit 1, Knit with Scale* Repeat everything between the *s to last two stitches (13 scales), Knit 2
5. Knit across
6. Repeat steps 2-5 until you have 14 rows of scales

LEFT GLOVE ONLY
7. Knit 16 *Knit 1, Knit with Scale* Repeat to last two stitches (6 scales), knit 2
8. Knit across
9. Knit 16 *Knit with Scale, K1* Repeat to last two stitches (6 scales), knit 2
10. Knit across
11. Repeat steps 7-10 until you have 10 rows of scales.
12. Knit 2 more rows and bind off loosely.

RIGHT GLOVE ONLY
7. Knit 2 *Knit with Scale, K1* Repeat 5 times (6 scales), knit to end
8. Knit across
9. Knit 2 *Knit 1, Knit with Scale* Repeat 5 times (6 scales), knit to end
10. Knit across
11. Repeat steps 7-10 until you have 10 rows of scales.
12. Knit two more rows and bind off loosely.

This leaves you with something that looks like the image on the left which just leaves you with the sewing up.

I used mattress stitch to finish off since I like the invisible seam - if you haven't learnt that stitch yet it's brilliant and I recommend looking it up and using it on all the projects ever! I started at the top edge, stitched til it looked about right then started from the bottom and stitched until I had a decent sized hole for the thumb. 

The pattern leaves you with a small gap up the wrists - this was partly because having scales at the very beginning and very end of a row doesn't work right but it also gave me room to add a feature. I have fairly teeny wrists and this basically meant that while my hands were in the air these gloves fit me pretty well considering I made them for a man with larger hands than me, when I put my hands down by sides they slid down my arm making for a chunky knitted scale bracelet that was less than ideal. So I used a bit of the leftover yarn to lace up the scales in the gap and voila - a much better fit! Eventually I'll find a nice bit of thin ribbon to replace the yarn. 

The Final Product


 All in all I'm maybe 85% happy with these. I want to play with the pattern a bit to stop them sliding down the arm. This will probably involve adding a bit of ribbing before I start adding scales, removing a couple of scales and stitches from the wrist section or maybe attempting some different stitches to see what goes well with scales. Keep your eyes peeled for many scaled swatches next time!


Wednesday, 30 April 2014

A Quick Note On Purchasing Materials

I don't think there's anything better than the feeling of buying materials for a project. Be it 1500 scales for a set of scale maille gloves for a friend's LARP character (they arrived today, I am very excited and very much looking forward to getting started on that project!) or finding an absolute bargain on material to make ritual props.

I should mention at this point that rituals are like mini plays with the aim of making items or giving people magic powers at LARP. No religious groups were offended in the making of these items.

Today I went to my little wool and fabric shop and found the *softest* acrylic yarn to make the gloves with and while I was there I discovered lots of very cheap fabric in red, orange and yellow. Cue much dancing around the house waving around fabric and proclaiming "Look, lovely husband, I made fire! You should have more fire!" Lovely husband is used to such outbursts and of course aided me in my waving and flouncing with fabric-fire. Who needs TV?

Sunday, 13 April 2014

The Dragon Scale Necklace


This weekend my obsession has been making this dragon scale necklace. My first chain maille project, my first time using scales (apart from the knitting sample I tried earlier in the week) and my first time making jewellery of any kind. I'm not going to lie, it was a little trickier than I imagined but I had some really good tutorials to hand and I learnt a lot as I went along. I'm really happy with how it worked out but I also know what I'd do differently next time. So without further ado: The Dragon Scale Necklace Project.

The Supplies

For this project I used:
93 Anodized Aluminium Scales
Approximately 400 RD4-50 Anodised Aluminium Saw Cut Jump Rings
1 Silver Toggle Clasp

I ordered 100 Scales and 500 jump rings from Bead Sisters which is a UK supplier that offered good prices, free postage and a wide range of colours and so many jump ring options that I was really glad of the guidance. They also had some really good beginner projects so big thumbs up all round really. For this project I think Bead Sisters were my best option supplier wise. There aren't many UK suppliers and these were the most helpful and the best prices for buying small amounts.

Fun story - The champagne/ pale gold scales are the same ones used for the Mirkwood Elves armour in The Hobbit films!

If I were going to embark on a bigger project I think I would have to look at a better bulk supplier like The Ring Lord which is based in Canada but works out much cheaper for buying in bulk, even taking into account the postage and the UK customs which are getting ever more expensive.

The pliers and clasps came from an eBay shop called Bead Delighted. They're about what you expect from an eBay shop to be honest, good price, fast delivery, good but nothing out of the ordinary.

The Tutorials

I didn't really follow a tutorial to the letter but I did have a lot of guidance from three places in particular.

Bib Necklace Tutorial - This is a free tutorial from the aforementioned Bead Sisters and particularly helped when I was first starting out, working out how to lay out my scales. The pictures were helpful to a point but I didn't really like the final product as I wanted something wider, more colourful and with a chain maille choker to hold it up.

How to Weave Scalemail - This video from The Ring Lord was absolutely brilliant to learn from. It's really clear and really gave me a good idea of what the pattern should look like and how best to handle the jump rings and scales. 

2 in 2 Chain Maille Weave - There are so many weaves that you can achieve with chain maille that there are oodles of projects in those alone. This one was a simple pattern that looks really delicate and wasn't too thick for a choker.

The Project

I started out with four scales of each colour and linked them so that each scale had two links in it. It wasn't immediately apparent which ones I should be adding the next row to so to make it easier I added links to alternate scales and threaded an old chain through them. By lifting it slightly I could see which scales would make the top row and which were the row to add the next layer to. To make it even easier I lifted the second row scales so they sat on top.
Laying out the scales was made easier by adding a temporary chain through the top row
The scales were attached in a diamond pattern with each scale having two links to the above row. Each row added two scales of each colour moving slightly to the right with one row then back to the left with the next to keep the lines straight. Once you get started the pattern is really easy to pick up although in hindsight, I wish I'd drawn up my pattern before I started so I knew how I wanted the bottom to look.


I made a couple of mistakes as I went along but they were easy enough to fix with very few rude words! The tricky part was getting the shape right since I didn't plan in advance and hadn't made a middle row. This meant that my pattern couldn't be perfectly symmetrical and I had to make do as best I could. My OCD is still itching that there are more of some colours than others but the shape looks right and my OCD doesn't itch enough to make me want to take it apart (yet). I know better for next time.

The chain was actually the easiest part and I knocked it up pretty quickly using the tutorial linked above. With every link I was very aware that this would be sat on my neck, perilously close to my very long hair so I took extra care with every part to make sure that the rings were closed with no sharp edges or bits that could catch on my skin.

I originally attached the scales at every fourth ring which stretched out the scales so they hung slightly strangely. By removing it all and attaching them to every third ring I got a much more natural hang. Once I had those all attached I started adding links starting from the middle and working my way out from either side to make sure everything hung central.

The final part was adding the toggle and trying it on. The first time I tried it on it was a little tight so I added two more links and tried it again until it was comfortable. If I were making it for someone else I probably would have measured their neck first but for myself I'm happy to suffer in the name of art!

The Final Product


 Ta-da! One dragon scale necklace!

I learnt so much from this project. The important of planning being the primary one I think. Whilst I'm happy with how it looks, part of me knows that it's only a matter of time before I pull it apart and fix the symmetry issue. Or maybe I'll sell this one on and start again with a new batch of scales, who knows? I do need a way of funding my crafting habits - any volunteers to sponsor the next project? ;)

Wednesday, 9 April 2014

Knitting with Scales


The first step of any craft project is to impulse buy anything you see that looks shiny, pretty, cool or challenging. So this week I may have bought 100 scales, 500 jump rings, a set of pliers and some findings with the intention of making some sort of beautiful dragon necklace. I've never made jewellery or chain maille or anything with scales before but I've seen beautiful photos on Etsy and Pinterest, how hard could it be, right?

The Supplies

Today my scales and jump rings arrived from Bead Sisters which is a lovely website and one of the very few UK suppliers I could find for scales. At £1.50 for 20 scales and £8.85 for 500 jump rings I figured that it sounded like a good, cheap start to a new craft. I bought 5 different colours to match the elemental drakes from my LARP group and the jump rings in champagne to match one set of scales.

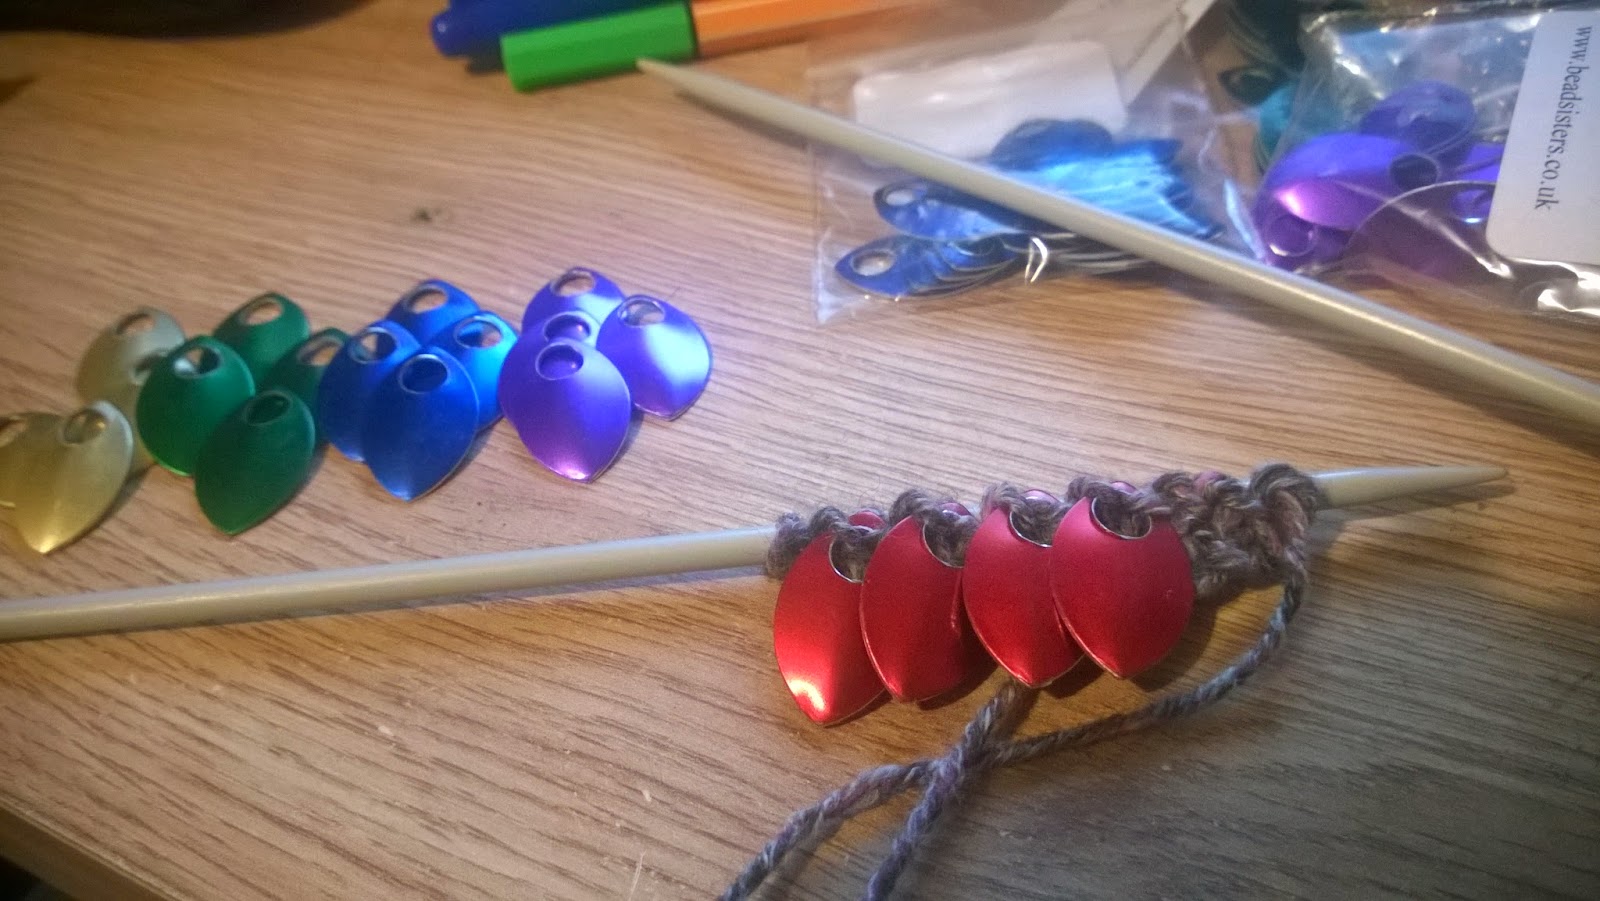
Of course, my pliers and findings haven't arrived yet but here I am with this whole bag of new toys and nothing I can do about it! Or is there? A little internet research tells me I can knit with scales and before I know it I'm knee deep in video tutorials, how tos and hints and tips from around the web. The best page I've found for this, and the one I'd highly recommend for anybody else starting out is Crafty Mutt's Learn to Knit With Scales. This is an amazing blog that has everything you need to start out, including a video tutorial, step by step instructions with photos and a little sample pattern at the bottom for practising with.

The Project

Having read her pattern and all the hints and tips, I picked up my 4mm needles, some yarn I had handily close to my desk and 4 scales of each colour to make a little sample. The pattern I used is as follows:

Cast on 12
1. Knit 2, *Knit with scale, Knit 1* (repeat 4 times), Knit 2
2. Knit across
3. Knit 2 *Knit 1, Knit with scale* (repeat 4 times) Knit 2
4. Knit across.

And that's it. That simple. 

When I'd used up all my colours I cast off and added a little tie so I could make an armoured cape for a creme egg. When I got bored of parading around my little armoured friend I gathered the top, tied it to my necklace and claimed it was a mini-dragon egg. 


I quite like my mini-dragon egg pendant, one day I may make it properly. I'll add that to my future projects list :)

What would I do differently next time?

This was only a sampler so I'm not too fussed about it not being perfect but I think next time I would have to neaten the edges that aren't covered by scales so the wool isn't visible. If I was doing a dragon egg I'd have to add some shaping and work out how to do the top and bottom neatly.

Monday, 7 April 2014

Concerning Dragons and Other Mythical Creatures


An Introduction

So I've started a new blog for all my creative needs. I tend to start a lot of projects and not all of them get finished because I have a very short attention span, so I'm hoping that by keeping a blog of my progress along with the tutorials that I'm following I'll be a little more motivated to finish the things I start.

I mostly craft for massively geeky reasons - I make dice bags for tabletop roleplay, kit for my larp character and gifts for other geeky friends or family. As you can probably guess from the blog name, I'm a big fan of Game of Thrones and not-very-secretly want to be the mother of dragons when I grow up.. preferably the mother of dragons that Doctor Who wants to take on adventures with him (because Ancient Greece needs more dragons) But enough of introduction and on to the blog itself.


A Beginning

First of all a confession. I already have 3 projects on the go and none of them are looking likely to attract my attention any time soon. I have a dress that was really tight at the bottom so I've added panels to it from the waist. But this was before I had a sewing machine and I got bored of hand stitching such long seams. It's sat at the bottom of the stairs hoping for a second chance - it will only take 10 minutes so I should really give it that chance.

The second project is a knitted hood from this tutorial. It looks very warm and I was really looking forward to having an awesome hood for the winter.. but then I bought a sewing machine and in one weekend made myself a gypsy coat out of charity shop jumpers and the poor hood has been sat looking folorn at me ever since.

The third project was possibly a little bit overambitious. Having only ever succeeded in one machine sewing project (the previously mentioned gypsy coat), I decided that I wanted to make a frock coat for my beloved. So I gathered the materials for a mock up and a pattern from Simplicity (Simplicity 4083 to be exact) and I cut out *all* the pieces and cut them out and stitched all the top parts together on my shiny new machine.. and then there were sleeves. Some kind of torture devices sent to seamstresses to test their resolve and having sort of attached one with a deal of wrinkling and what I'll call "gathers", I lost the desire to do the next one. That one will probably get finished soon but I'm not sure I'll be making one out of expensive material until I've had more experience of sleeve-wrangling.

But none of these unfinished projects are as exciting as the one I'm about to embark on! Today I bought scales and jump rings and flat nosed pliers and as soon as they arrive I shall regale you with stories of my very first jewellery project!